Hello Friends
Welcome to another decorating with seashell series
I created a decorative storage box using..... yes you guessed it
SEASHELLS
Inspiration comes in many forms
Mine happened to be in the form of a cardboard box
We ordered take out food the other night and this is the box it came in. I thought if the box was sturdy enough to hold a lot of food then it would be sturdy enough to use for storage.
AND SO.........
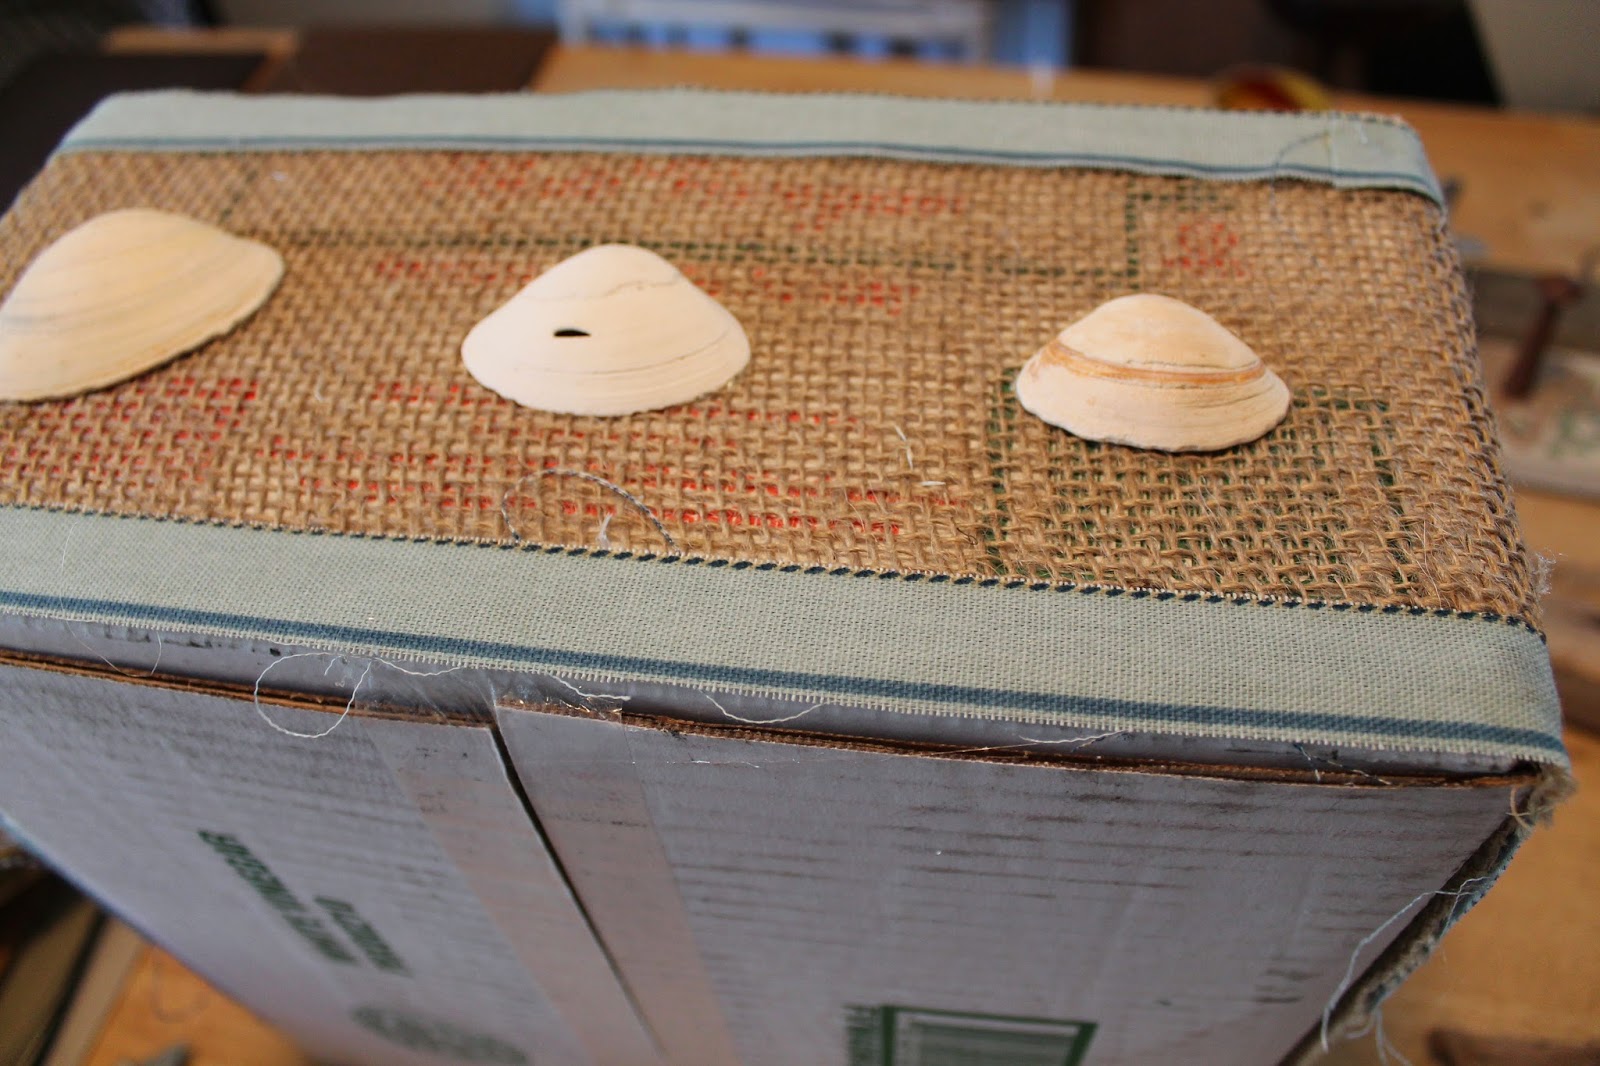
I used a roll of burlap with the same width as the box. To cover the edges and give it a finished look I used leftover fabric from my no-sew curtain trim project. You can read about that here.
First I wrapped the burlap around the box gluing each corner as I went around. Then I did the same thing with the fabric trim.
Next, I chose 9 shells.
I glued around the rim of each shell
And placed three shells along the side of the box on top of the burlap.
Hold firmly for a few seconds so the glue adheres to the burlap.
And there you have it; a simple way to decorate for summer using an empty take out food box.
I used it as a planter with a zinnia inside.
Anyone getting married over the summer?
This would be a great DIY project for a rustic wedding centerpiece.
This would be a great DIY project for a rustic wedding centerpiece.
My poor zinnia needs some TLC
I think summer decorating should be simple and this box reflects just that. I like how the print on the box shows through the burlap. If that is not your style you can double up on the burlap or you can paint the box.
In your kitchen to store plates, towels, napkins, or bottles. In the bathroom to store toiletries, bathroom tissue, or stack towels inside. For the office, I'm thinking it could hold printing paper or mail. How about your craft room to store fabric, ribbons, paint, papers. In your child's bedroom or playroom to corral toys or books.
I hope I inspired you to think outside the box!


How neat! I have lots of seashells and I'm always looking for ways to decorate with them. Of course I wish we could have enjoyed the take out, too! heehee! Hugs, Diane
ReplyDeleteThat's a really cute idea!
ReplyDeleteNice idea - there are so many inexpensive ways to decorate. :) Thank you for sharing this.
ReplyDeleteClever, cute decorating idea! The finished product looks nice on your table. Cool for summer décor. Stopping by from Fabulously Frugal Thursday.
ReplyDeleteThanks so much for sharing your post at the Say G'day Saturday Linky Party. I've just pinned this idea to the Say G'day board!
ReplyDeleteBest wishes,
Natasha in Oz
Featuring at this weeks' Trash 2 Treasure Party. Who would guess there was a cardboard box under there? :) Love the creativity!
ReplyDeleteHi Julie, wow the box looks lovely now and I love how you used shells to decorate it. I will be going to my moms beach house and now I know what to do with all the shells I find. Have a nice weekend.
ReplyDeleteJulie
These would be great organizing bins for our school room too! Thanks for sharing! I am going to pin this :)
ReplyDelete